
A tab area is an advanced element used to display individual blocks or panels of content .The panels that can be displayed by clicking the title for each tab. The titles appear in one row like folder tabs. This tool interface is used in combination with content blocks; create a content block and then add the tab element to that area.
This resource shows you how to use Cidi Labs content blocks for a page, and the process is the same for assignments, discussion, announcements, and the quiz details page.
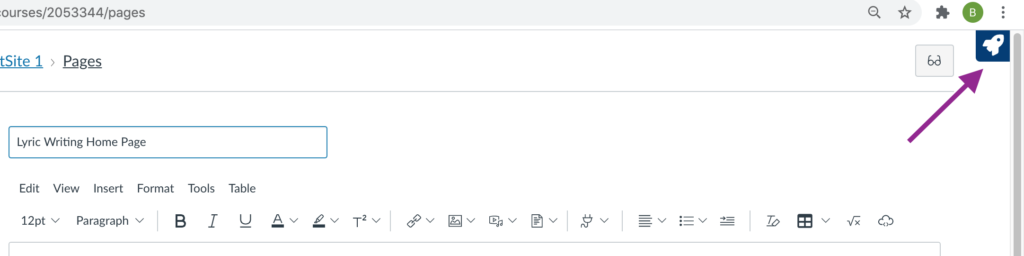
- Click edit on any page in Canvas.

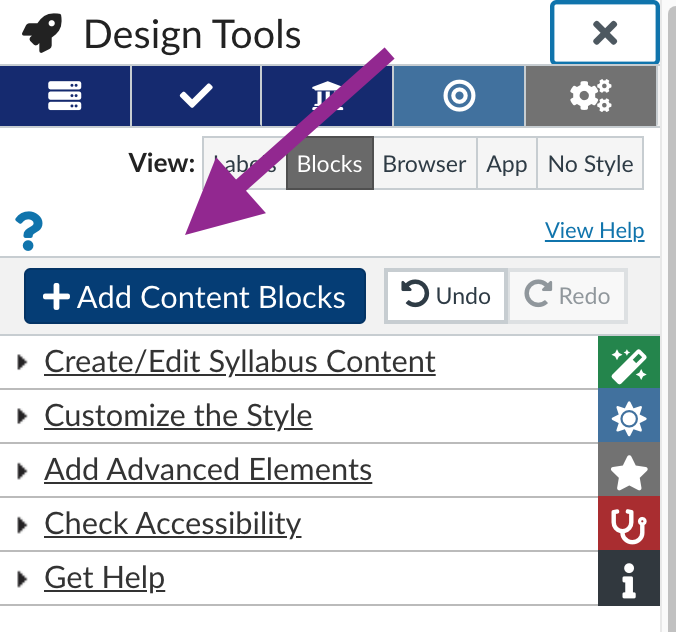
2. Launch the Design Tools interface by clicking on the rocket icon in the upper right-hand corner of the screen, or by using the short-cut keys Option-Shift-D on a Mac or Alt-Shift-D on a PC.
3. Click on the Design Tools settings icon (gears).
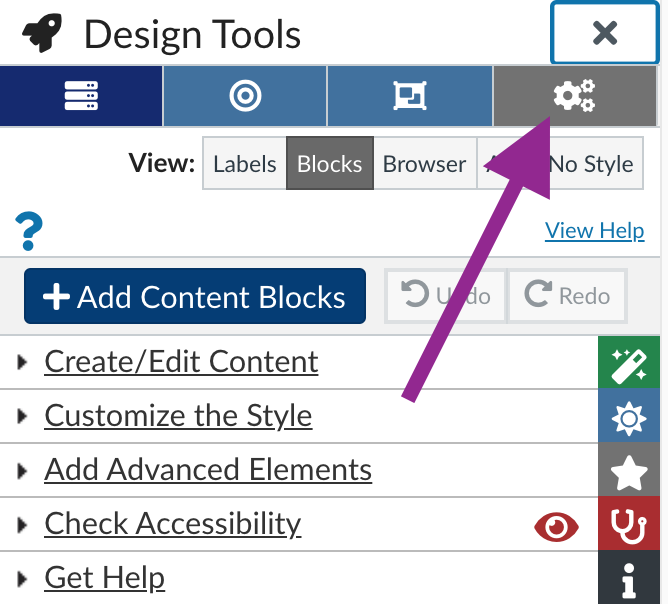
4. Select the “advanced” comfort level option, or scroll down to enable just the navigation bar option.

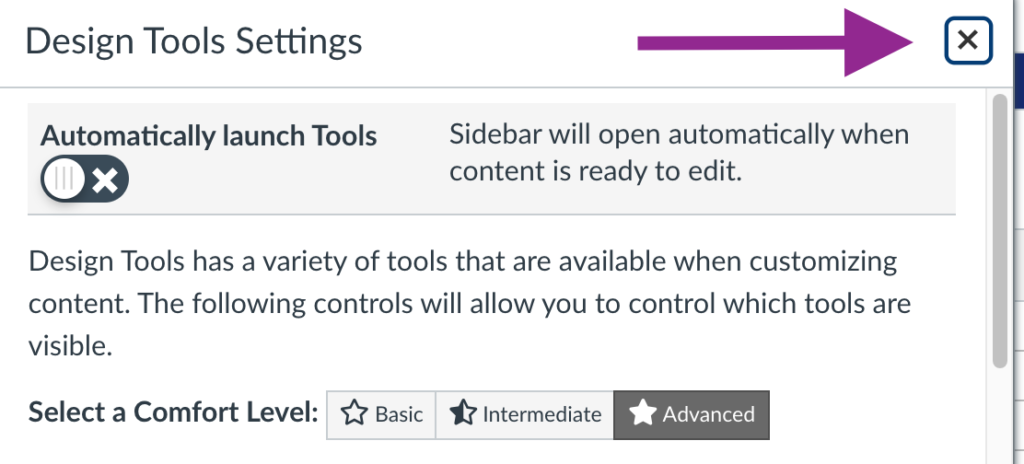
5. Close the settings editor.
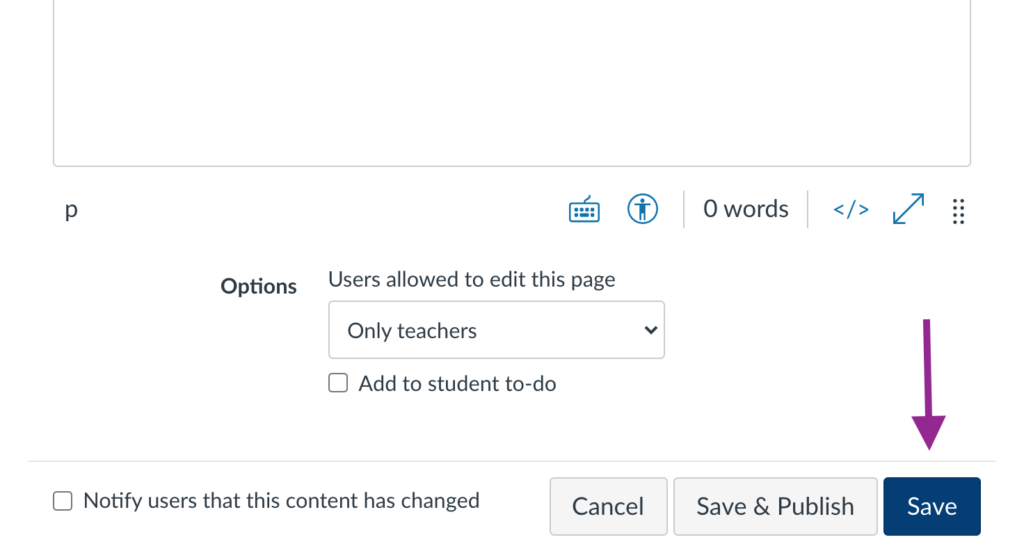
6. Save the page.
- In the Canvas pages screen, choose “view all pages.”

2. Launch the Design Tools interface by clicking on the rocket icon in the upper right-hand corner of the screen, or by using the short-cut keys Option-Shift-D on a Mac or Alt-Shift-D on a PC.

3. Choose “+ Add Content Blocks” in the Design Tools editor.
4. Choose the content blocks from the preset options, or add your own in the text field provided in the pop-up window. You will place your tab within the content block.
5. Save your new page.
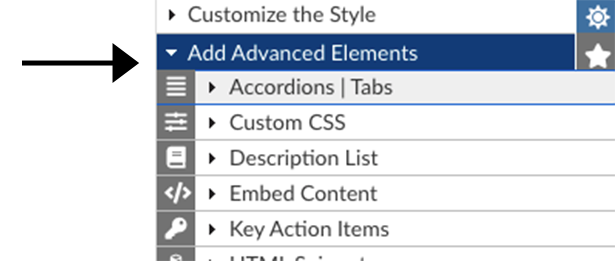
- Select the Add Advanced Elements
2. Place the cursor in the Rich Content Editor where you want the panel widget to be created. Click Add Panel Widget at Cursor. Then select the Tabs option.
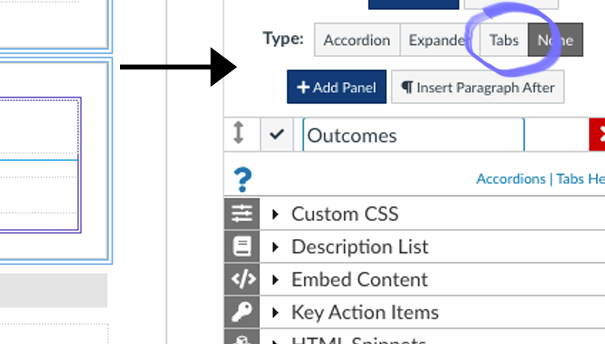
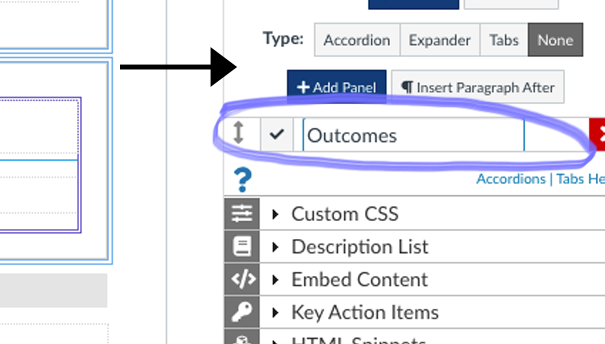
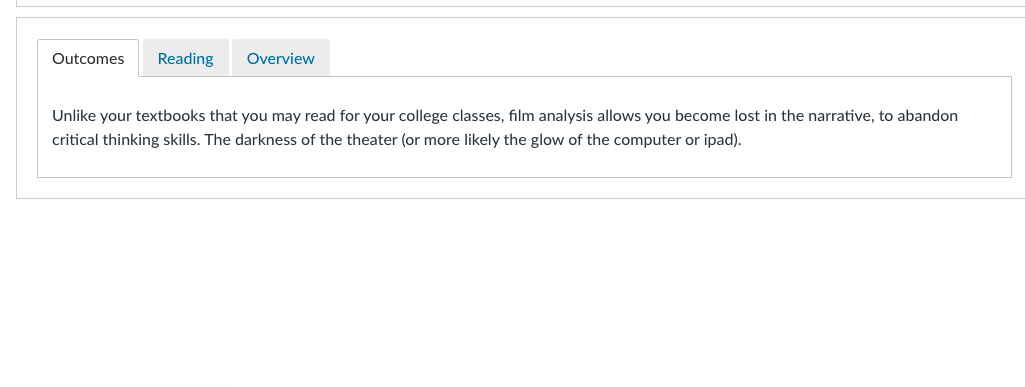
3. Select Add Panel. You will see a panel created in the Rich Content Area of your page. Add a Table Title to the in field provided. In the example image below we named our panel tab “Outcomes”
4. You may add multiple tabs by selecting Add Panel for as many tabs as you need. In this example we have created three tabs named them Outcomes, Reading, and Overview.

5. Add your text content to the tabs. You may also place images and movies within tab areas.

6. Click Save. Your panels should look similar to the example image.
Last Updated January 14, 2023