
Explore the information below to learn how to view and pay tuition in ctcLink.
Choose your preferred format:
Step-by-Step ctcLink View and Pay Tuition Tutorial
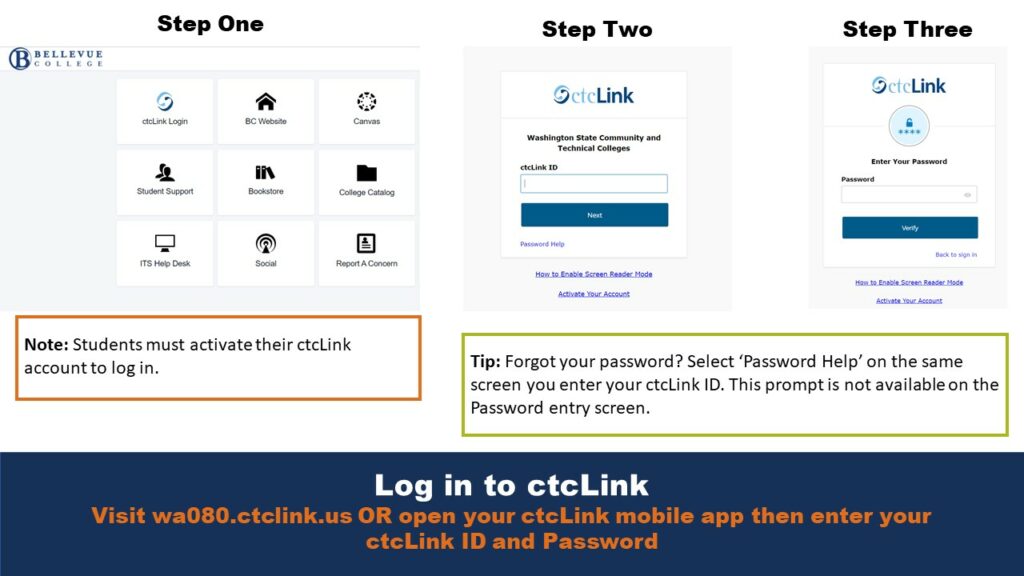
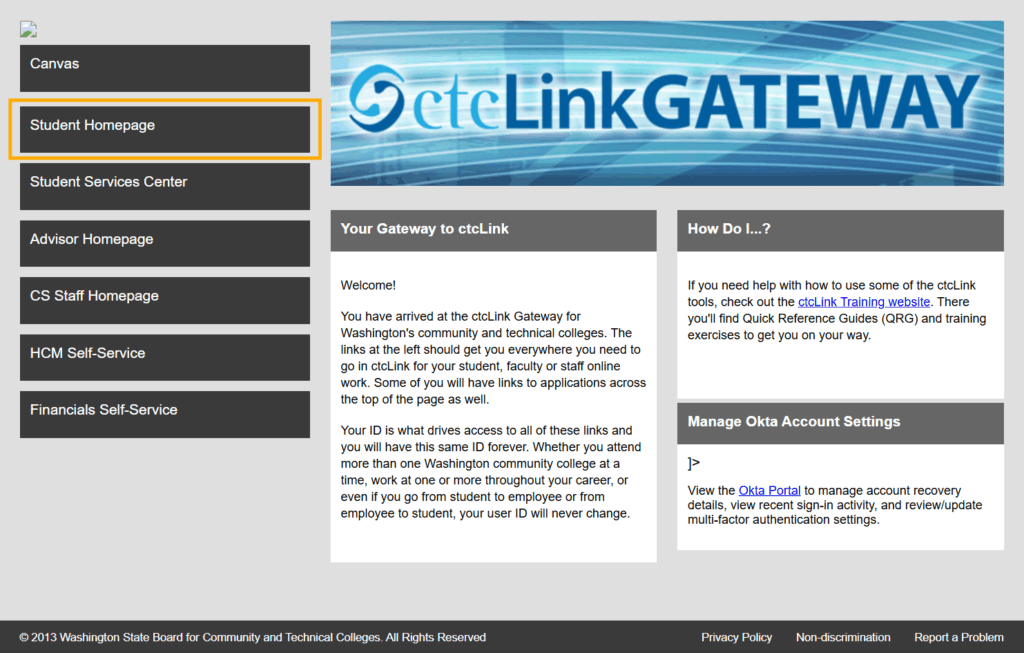
Log in to ctcLink
Visit wa080.ctclink.us OR open your ctcLink mobile app then enter your ctcLink ID and Password
Note: Students must activate their ctcLink account to log in.
Tip: Forgot your password? Select ‘Password Help’ on the same screen you enter your ctcLink ID. This prompt is not available on the Password entry screen.
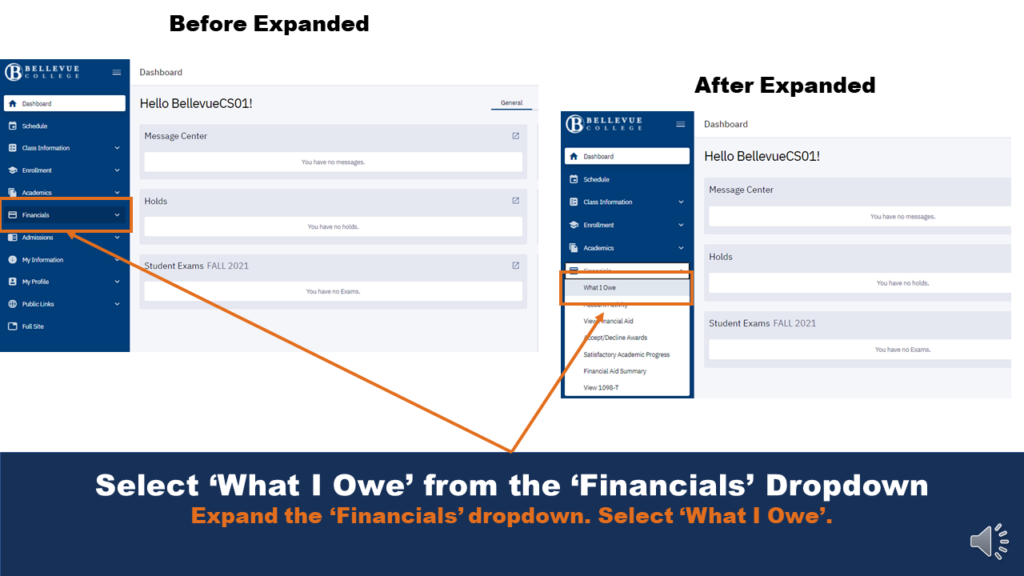
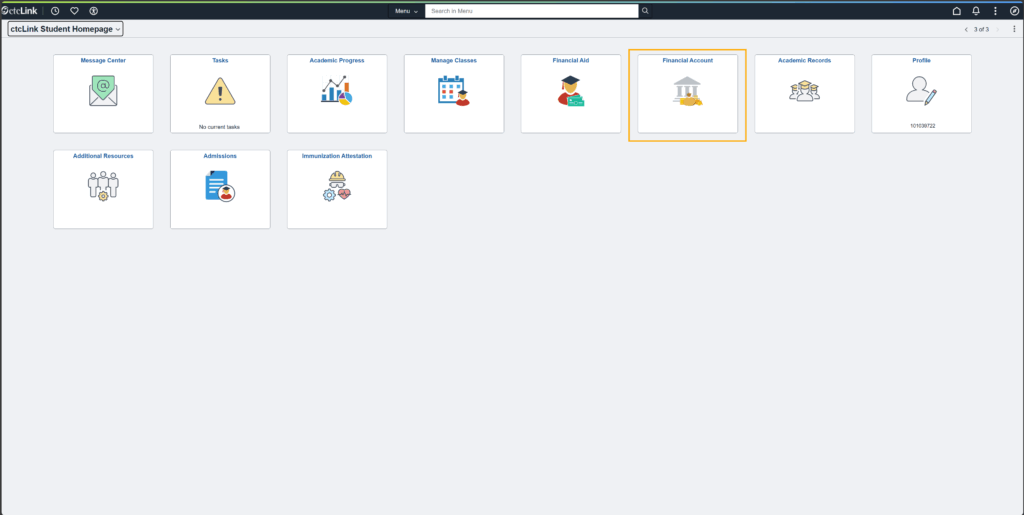
Select ‘What I Owe’ from the ‘Financials’ Dropdown
Expand the ‘Financials’ dropdown. Select ‘What I Owe’.
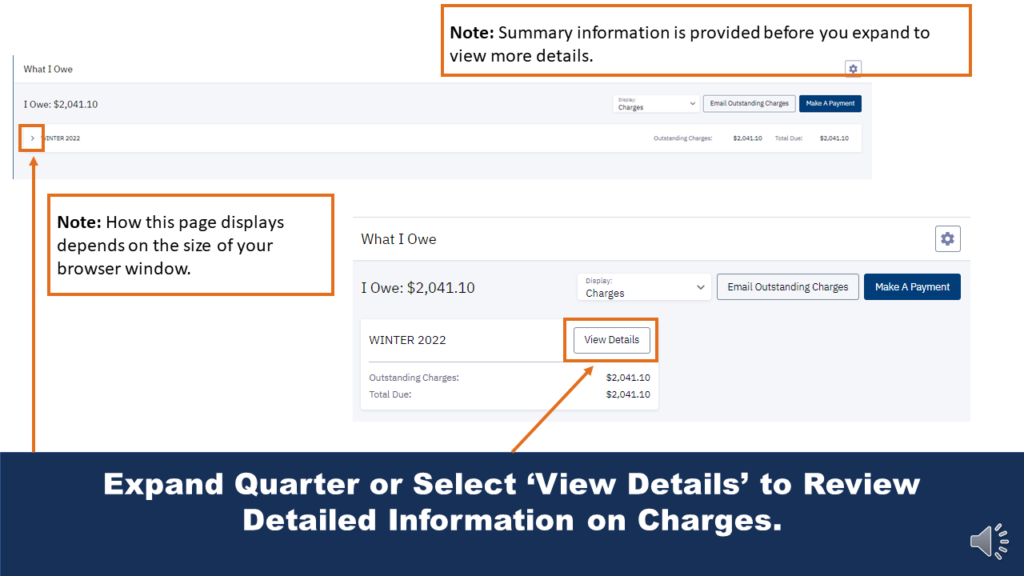
Expand Quarter or Select ‘View Details’ to Review Detailed Information on Charges
Note: Summary information is provided before you expand to view more details.
Note: How this page displays depends on the size of your browser window.

Review Detailed List of Fees and Charges
Select ‘Make A Payment’ when ready to pay.
Note: Different types of students might have different fees and charges. For example, the student in this example is enrolled in a Bachelor of Applied Science (BAS) program. As such, they have charges specific to BAS students.
Review Balance in ctcLink Desktop (Full Site) View
Access the full site through the following link: https://myaccount.ctclink.us/
After logging in, click the ctcLink tile and then select Student Homepage.
In the Student Homepage, click the Financial Account Tile, which will bring you to the Review Balance.
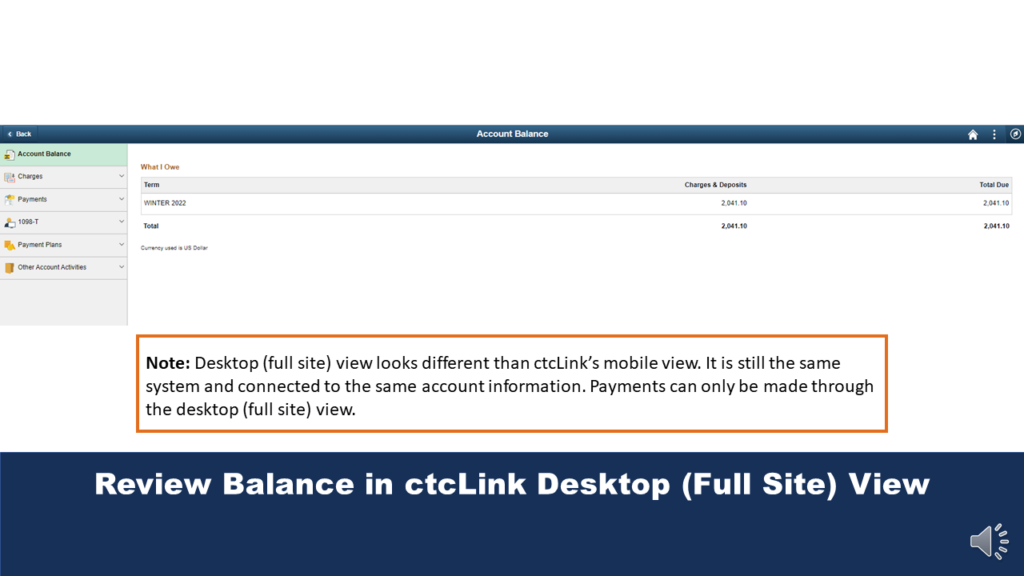
Note: Desktop (full site) view looks different than ctcLink’s mobile view. It is still the same system and connected to the same account information. Payments can only be made through the desktop (full site) view.
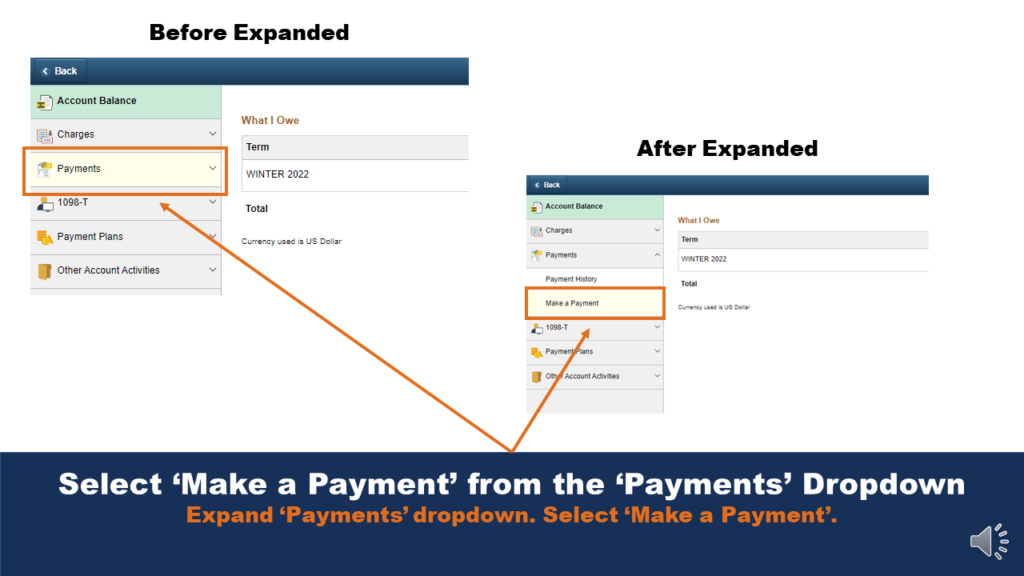
Select ‘Make a Payment’ from the ‘Payments’ Dropdown
Expand ‘Payments’ dropdown. Select ‘Make a Payment’.
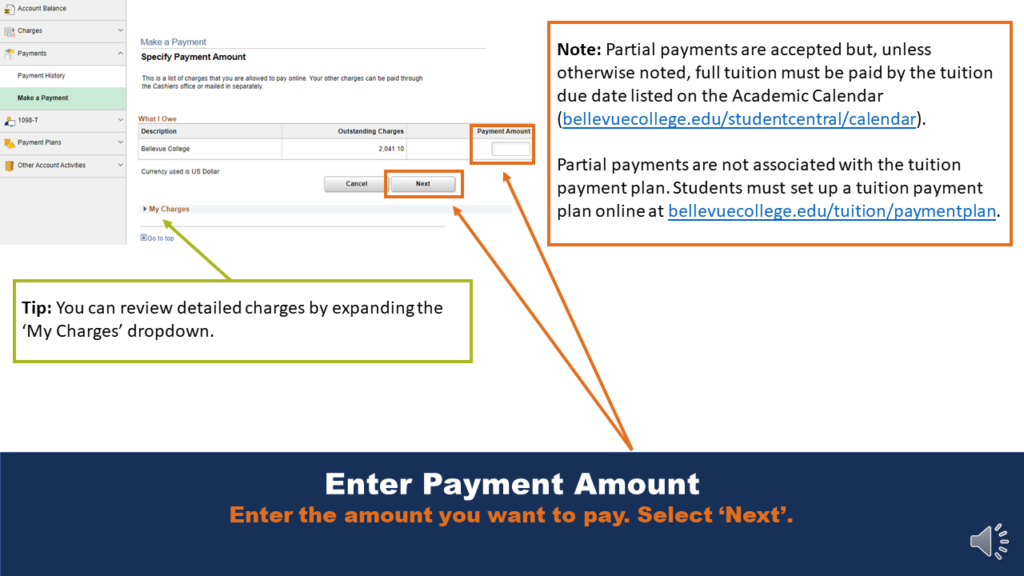
Enter Payment Amount
The default schedule view is the current week, indicated in the top-left of the screen.
Enter the amount you want to pay. Select ‘Next’.
Note: Partial payments are accepted but, unless otherwise noted, full tuition must be paid by the tuition due date listed on the Academic Calendar (bellevuecollege.edu/studentcentral/calendar). Partial payments are not associated with the tuition payment plan. Students must set up a tuition payment plan online at bellevuecollege.edu/tuition/paymentplan.
Note: Calendar view displays information for all courses on your schedule for a selected time period.
Calendar View: View your class schedule for the selected time period in calendar format. Lists all occurrences of classes, exams, and/or wait list classes.
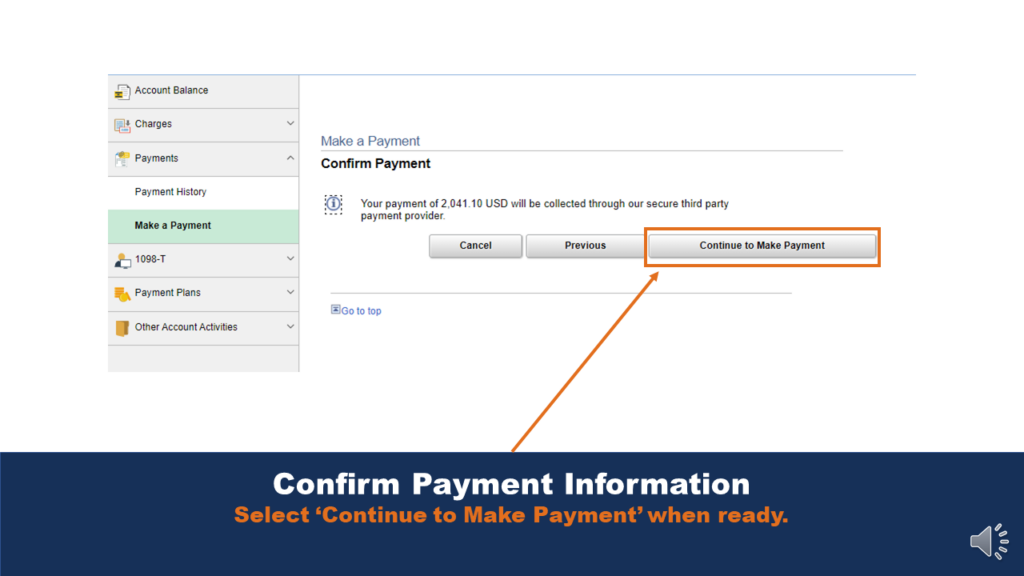
Confirm Payment Information
Select ‘Continue to Make Payment’ when ready.
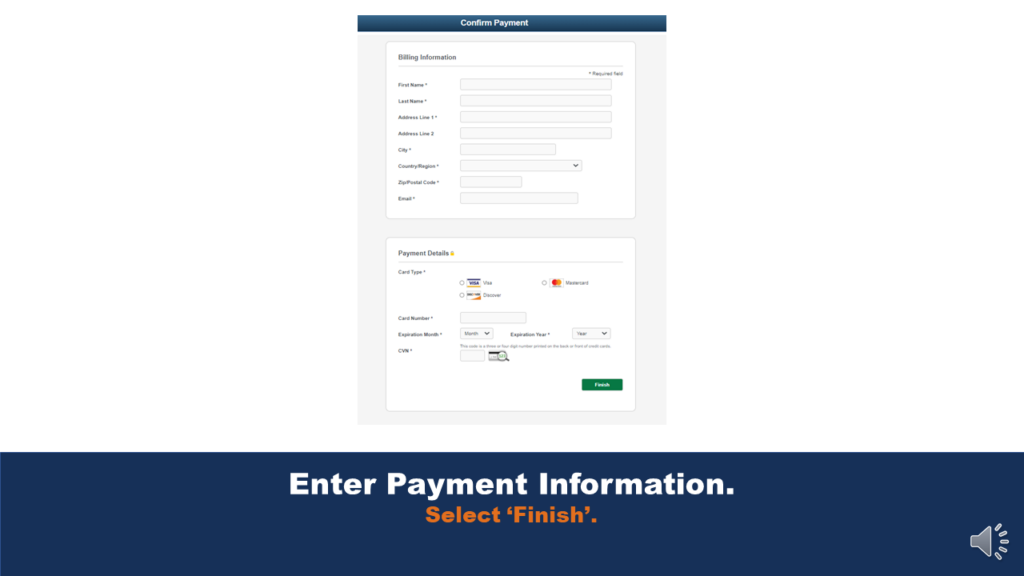
Enter Payment Information.
Select ‘Finish’.
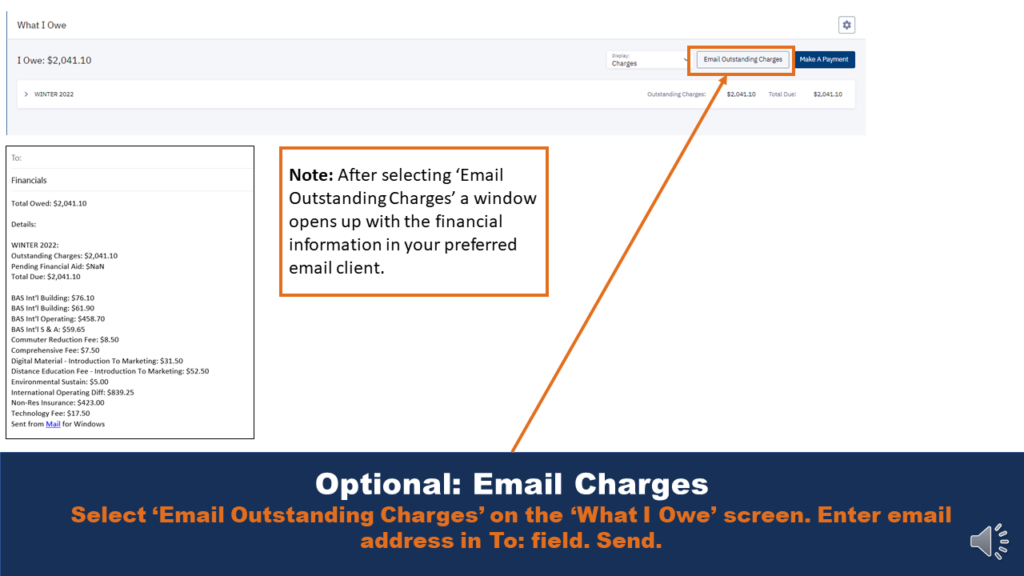
Optional: Email Charges
Select ‘Email Outstanding Charges’ on the ‘What I Owe’ screen. Enter email address in To: field. Send.
Note: After selecting ‘Email Outstanding Charges’ a window opens up with the financial information in your preferred email client.